

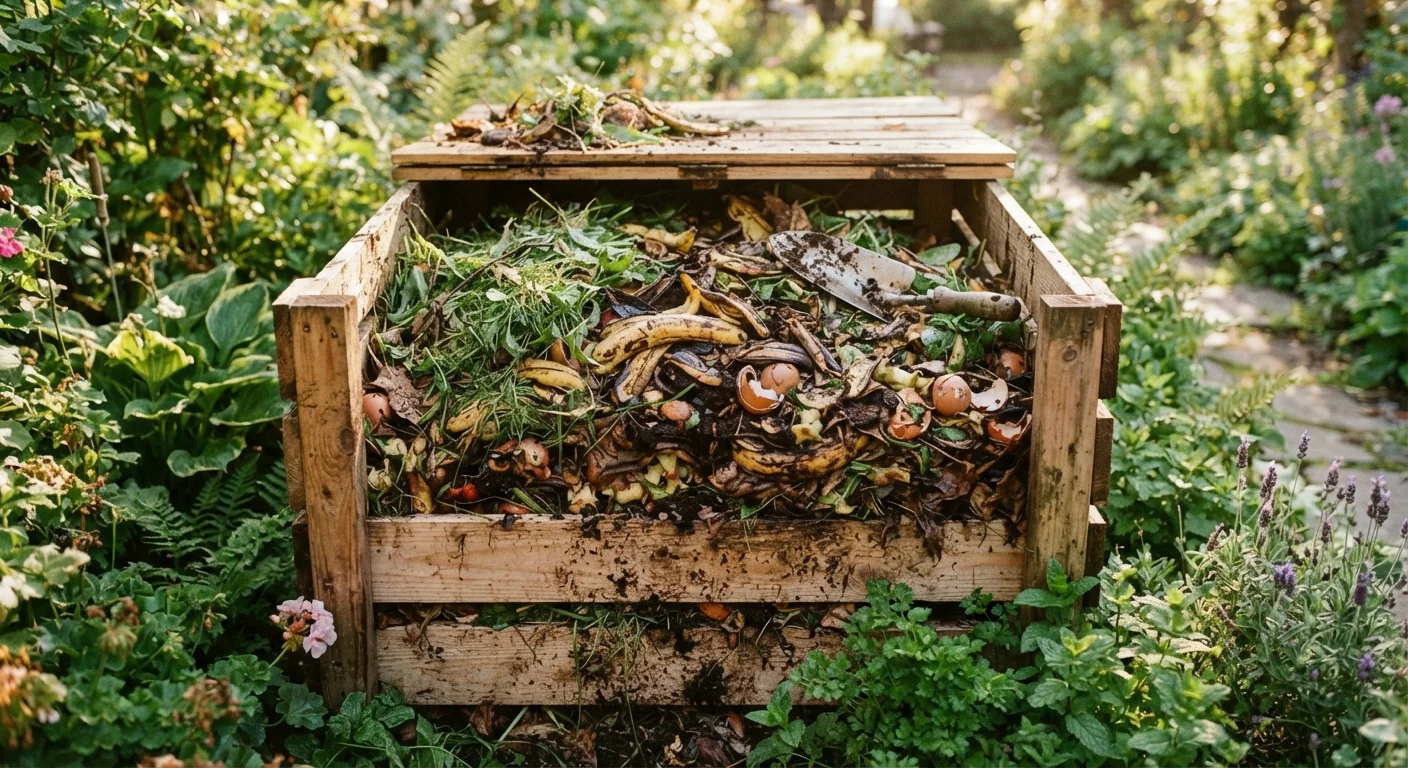
Why Composting Is Worth the Effort
Composting converts material that would otherwise go to landfill - vegetable peelings, coffee grounds, fallen leaves, grass clippings - into something genuinely useful for your garden. The end product, often called finished compost or humus, acts as a soil conditioner rather than a fertilizer: it improves the structure of both heavy clay soils and fast-draining sandy ones, supports beneficial microbial life, and helps retain moisture around plant roots.
For gardeners, this matters enormously. If you're starting a vegetable garden from scratch, building your soil's organic matter content from the beginning gives you a significant head start. And if you're practicing no-dig gardening, compost becomes the central input - laid on the surface each season to feed the soil without turning it.
~30%
Household waste that can be composted
The US EPA estimates that food scraps and yard trimmings together make up roughly 30% of what Americans throw away.
2-6 months
Typical time to finished compost
Hot, actively managed piles can finish in as little as 8 weeks; passive cool composting typically takes 6 months or longer.
3 ft × 3 ft
Minimum pile size for effective heating
Extension services generally recommend a minimum volume of about 1 cubic yard to generate and retain the heat needed for faster decomposition.
Choosing a Composting Method and Bin
There's no single right approach - your choice depends on how much space you have, how much material you generate, and how quickly you want results.
- Open-heap composting: The simplest method. Pile materials in a corner of the garden, ideally at least 3 ft × 3 ft. Slow but requires almost no setup.
- Enclosed plastic bins: Widely available and inexpensive. Retain heat and moisture better than open heaps, making them suitable for smaller yards. Most local authorities sell these at reduced cost.
- Wooden slatted bays: Allow good airflow. A two- or three-bay system lets you keep one pile actively building while another finishes. Excellent for larger gardens with plenty of material.
- Tumbler composters: Barrel-style containers on a frame that you rotate to aerate the pile. Can produce compost faster when managed well, though they hold less material.
- Worm bins (vermicomposting): Use red wiggler worms to break down food scraps. Compact enough for balconies or small spaces. Ideal for those growing food in a small space.
Wherever you site your bin, choose a spot on bare soil (so worms can enter from below) with partial shade to prevent the pile drying out too quickly in summer.
Site Your Bin on Bare Soil
Placing your compost bin directly on soil - rather than concrete or paving - allows earthworms to migrate in naturally and excess moisture to drain away. If you must compost on a hard surface, add a layer of finished compost or soil in the base and check moisture levels more frequently.
What to Add (and What to Leave Out)
Successful composting hinges on balancing two categories of material:
- Greens (nitrogen-rich)
- Vegetable and fruit peelings, grass clippings, coffee grounds and paper filters, fresh plant trimmings, tea bags (paper-based), eggshells.
- Browns (carbon-rich)
- Cardboard (torn up), dry fallen leaves, straw, newspaper, paper bags, woody prunings (chipped or broken small), sawdust from untreated wood.
A rough target is roughly equal volumes of greens and browns, though many gardeners find that slightly more browns prevents odor. Layer them where possible rather than adding large amounts of one type at once.
Materials That Cause Real Problems
Meat, fish, cooked foods, dairy, and bones should never go into a standard backyard compost bin - they attract rodents and create serious odor issues. Diseased plant material and weeds with mature seeds should also be excluded; standard home piles rarely get hot enough to reliably kill pathogens or seeds, which means they could spread problems when you apply the finished compost.
Avoid adding meat, fish, cooked foods, dairy products, or bones to a standard outdoor compost bin - these attract pests and create unpleasant smells. Also leave out diseased plant material, invasive weeds that have gone to seed, and anything treated with persistent pesticides. Dog or cat waste should never be composted in bins that will be used on food crops.
Keep a small covered bin or compostable liner on your kitchen counter to collect scraps daily, then transfer to the outdoor bin in batches. Burying fresh scraps under a layer of browns each time dramatically reduces fly activity.
Exposing fresh nitrogen-rich material on the surface invites fruit flies and odors; layering with carbon material suppresses both while maintaining balance.
Shred cardboard and paper before adding them - unbroken flat sheets repel water and create impermeable layers that slow decomposition significantly.
Surface area directly affects microbial contact; smaller, looser pieces decompose far more efficiently than intact sheets.
Maintaining Your Compost Pile
Three factors govern how quickly your pile breaks down: moisture, air, and particle size.
- Moisture: The pile should feel like a wrung-out sponge - damp but not dripping. In dry weather, water it lightly. In wet weather, a cover helps prevent it from becoming waterlogged.
- Aeration: Microbes and worms need oxygen. Turn the pile every two to four weeks with a fork, or simply push a broom handle in several places to create air channels. More turning generally means faster results.
- Particle size: Smaller pieces break down faster. Shredding or chopping kitchen scraps and chipping woody garden waste significantly speeds up the process.
A well-managed enclosed bin in a temperate US climate typically produces finished compost in two to three months during warm seasons. A passive heap left largely undisturbed may take six months to a year. Both approaches work - the difference is simply time and effort invested.
Troubleshooting Common Problems
Most composting problems are straightforward to diagnose and fix:
| Problem | Likely Cause | Fix |
|---|---|---|
| Bad smell (ammonia) | Too many greens | Add more browns; turn to aerate |
| Bad smell (rotten eggs) | Too wet, too compacted | Turn pile, add dry browns |
| Pile not heating up | Too dry, too small, or too many browns | Add water and more greens; turn pile |
| Pests (rodents) | Food scraps on surface or unsuitable materials | Use enclosed bin; bury fresh scraps; avoid cooked foods |
| Pile stays too dry | Too much cardboard, poor siting | Water; add more greens; relocate out of full sun |
If your pile seems persistently slow, check the carbon-to-nitrogen ratio first - most sluggish piles simply need more nitrogen-rich green material to re-energize microbial activity.
Don't Apply Unfinished Compost
Adding compost that hasn't fully broken down can temporarily lock up nitrogen in your soil as microbes continue decomposing it, which may actually stunt plant growth. If in doubt, let the pile sit an extra month and check that no original materials are still identifiable. Unfinished compost can also introduce weed seeds into your beds.
Using Finished Compost in Your Garden
Finished compost looks dark, crumbly, and earthy-smelling - no recognizable food or plant pieces should remain. If you can see what went in, let it mature a few more weeks.
Common applications include:
- Soil amendment: Work 2-3 inches into planting beds before sowing or transplanting to improve structure and fertility.
- Surface mulch: Apply a 1-2 inch layer around established plants to retain moisture and suppress weeds. This pairs particularly well with the approaches described in our guide to organic vs. inorganic mulch.
- Potting mix ingredient: Blend up to one-third finished compost into potting mix for containers and raised beds.
- Lawn top-dressing: Sift finely and spread thinly over grass to improve soil below the turf over time.
Compost also works well as a seasonal soil top-up. When getting your garden ready for winter, spreading a layer of compost over empty beds protects soil structure through frost and gives a nutrient head start for spring. Used regularly, home compost reduces your dependence on bought-in soil improvers and closes a genuine loop between kitchen, garden, and soil.
EPA Composting at Home Guide
The US Environmental Protection Agency's overview of home composting methods, materials, and troubleshooting - a reliable free reference from a government source.
Your Local Cooperative Extension Service
US land-grant university extension offices publish region-specific composting advice tailored to local climate zones, materials, and common pest pressures. Search for your state's extension service online.
Community Composting Programs
Many US municipalities offer subsidized bin sales, drop-off composting sites, or educational workshops. Check your local public works or solid waste department for programs in your area.
The content provided on our blog site traverses numerous categories, offering readers valuable and practical information. Readers can use the editorial team’s research and data to gain more insights into their topics of interest. However, they are requested not to treat the articles as conclusive. The website team cannot be held responsible for differences in data or inaccuracies found across other platforms. Please also note that the site might also miss out on various schemes and offers available that the readers may find more beneficial than the ones we cover.