

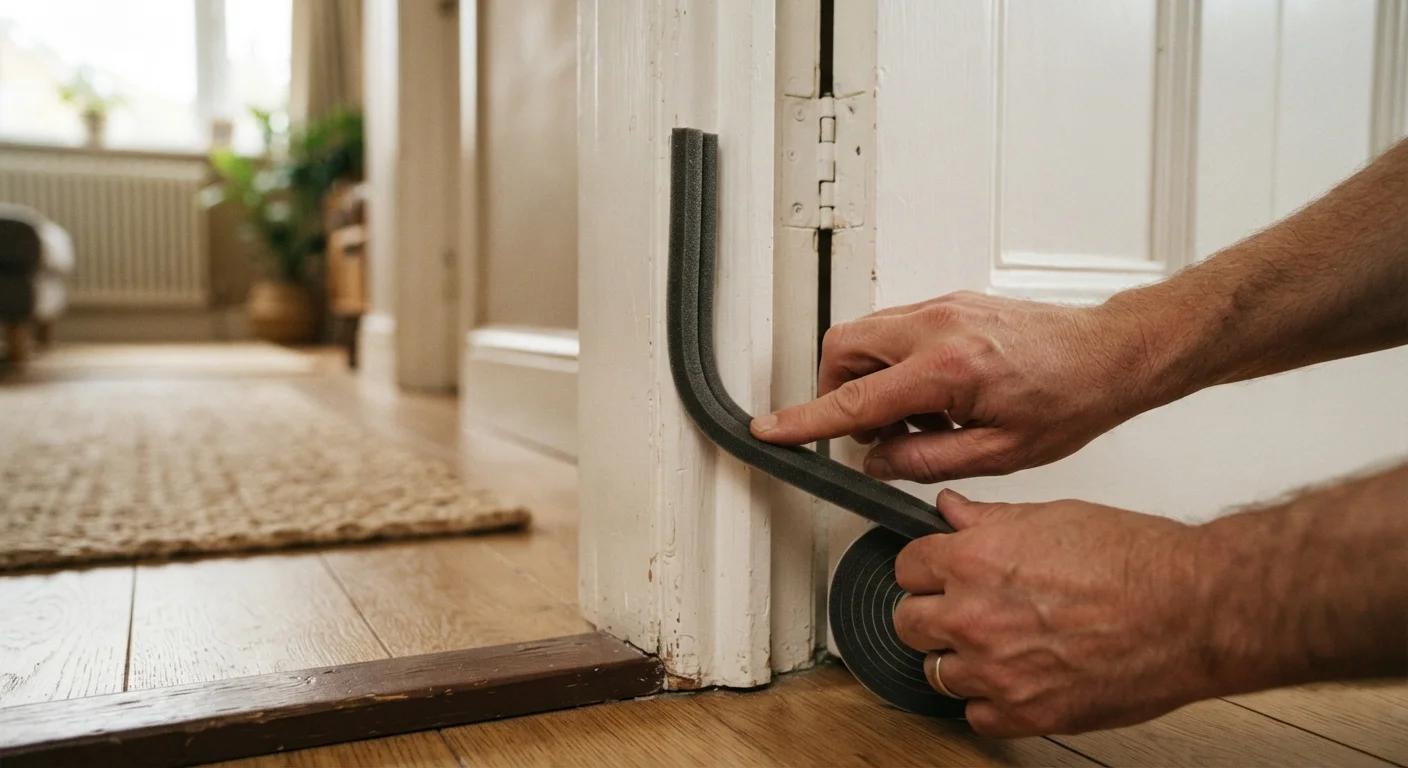
Why Weatherstripping Fails - and What to Look For
Weatherstripping is the flexible seal that lines the edges of doors and windows, blocking the exchange of inside and outside air. Over time, heat, UV exposure, moisture, and simple mechanical wear cause these seals to compress, crack, or peel away. Once that happens, conditioned air - whether heated in winter or cooled in summer - escapes continuously, and outdoor air infiltrates in return.
This is one of the most energy-relevant issues in a typical home, and it's also one of the most overlooked. Because weatherstripping degrades gradually, many homeowners don't notice until gaps become visible or draughts become impossible to ignore. Incorporating a weatherstripping check into your seasonal routine - as part of a broader pre-winter home maintenance checklist - helps catch problems before the coldest months arrive.
Test for Draughts Before You Buy
Hold a lit stick of incense or a thin strip of tissue paper close to door and window edges on a windy day. Any flickering or movement indicates an air leak. This simple test helps you pinpoint exactly which sections need attention before purchasing materials.
Common failure signs include visible gaps around a closed door when held against light, a door that rattles in wind, or a window that feels noticeably cold around its frame even when locked. Foam tape that has flattened completely and rubber bulb seals that have hardened or cracked are clearly past their useful life and should be replaced promptly.
What you will need
Choosing the Right Materials and Getting It Right
Selecting the correct weatherstripping material is just as important as installing it properly. Using foam tape on a high-traffic exterior door, for example, means you'll be repeating this job within a season. Match the product to the location, gap size, and how frequently that door or window is operated.
Tape Measure
Measure door and window perimeters accurately to determine how much weatherstripping material to purchase.
Utility Knife or Scissors
Cut weatherstripping material cleanly to the correct length for each section.
Isopropyl Alcohol and Clean Rags
Degrease and clean surfaces so adhesive-backed weatherstripping bonds properly.
Screwdriver
Fasten door sweeps or nail-on V-strip weatherstripping that requires mechanical fasteners.
Putty Knife or Flathead Screwdriver
Pry out and remove old, compressed weatherstripping without damaging the door stop.
For exterior doors - which experience the most movement and the largest gaps - compression strips or V-strips along the jamb combined with a door sweep at the bottom represent a durable, long-lasting approach. For windows, particularly double-hung types, V-strip inserted into the channel is largely invisible once installed and holds up well to repeated operation. Foam tape is best reserved for windows that are rarely opened, such as fixed storm windows or basement casements.
Don't Skip Surface Preparation
Adhesive weatherstripping applied to a dusty, oily, or damp surface will peel away within weeks, regardless of the product's stated quality. Always clean and fully dry the surface before application. Skipping this step is the single most common reason DIY weatherstripping fails prematurely.
Once you've completed installation, the door sweep and jamb seals should work together as a continuous barrier. Even a well-sealed door can't compensate for issues like foundation moisture intrusion - concerns about moisture management in other parts of the home are worth understanding separately, as outlined in this overview of common basement waterproofing mistakes.
Check Door Operation After Installing
Weatherstripping that is too thick or incorrectly positioned can prevent a door from latching or can cause the door to bind, putting stress on hinges and the lock mechanism. After installation, open and close the door several times to confirm it operates smoothly and latches fully without forcing.
Identify Where Air Is Leaking
Walk the perimeter of each exterior door and window with a tissue or incense stick on a breezy day. Note which sections - top, sides (called the door stop or jamb), or bottom - show movement. Also inspect existing weatherstripping visually: look for cracking, flattening, gaps, or sections that have peeled away. Mark problem areas with painter's tape so you don't forget them when purchasing materials.
Measure and Choose the Right Weatherstripping Type
Measure the full perimeter of the door or window using a tape measure. Then select the appropriate material:
- Foam tape (open- or closed-cell): Best for irregular gaps on windows and door stops. Easy to apply but compresses over time; suited to low-traffic windows.
- V-strip (tension seal): A folded strip of plastic or metal that springs open to fill a gap. Durable choice for the sides and top of doors and double-hung windows.
- Compression strip (rubber or silicone bulb): Attaches to the door stop and compresses when the door closes. Very effective for exterior doors.
- Door sweep: Mounts to the bottom of the door and seals the gap against the threshold. Necessary for most exterior doors.
Purchase slightly more material than your measurements to allow for clean cuts and minor errors.
Remove Old Weatherstripping
Pull away adhesive-backed foam or rubber strips by hand, working slowly to avoid tearing off paint or finish with them. For stubborn adhesive residue, apply a small amount of isopropyl alcohol on a rag and rub gently. Remove nail-on or stapled V-strips using a flathead screwdriver or putty knife. Check the surface underneath for any rot, damage, or gaps in the wood that may need repair before you install new material - weatherstripping cannot compensate for a structurally compromised frame.
Clean and Prepare the Surface
Wipe down the entire application area with a clean rag dampened with isopropyl alcohol or a mild household cleaner. Remove all dust, grease, and old adhesive residue. Allow the surface to dry completely - adhesive will not bond well to a damp surface. For painted wood surfaces, ensure the paint is sound and not flaking; loose paint will cause adhesive strips to fail early.
Cut and Install the Weatherstripping
Cut your chosen weatherstripping material to length using scissors or a utility knife, cutting at a 45-degree angle at the corners for a cleaner fit. Work section by section:
- Top of door or window first: Apply the horizontal piece, pressing firmly along its full length.
- Side sections next: Run strips from the top piece down to the threshold or sill, trimming flush at each end.
- Door sweep last: Position it so it just grazes the threshold when the door is closed; mark the screw holes, pre-drill if necessary, and fasten in place.
For V-strip, tuck it into the channel or tack it with small nails, ensuring the open end of the V faces the outside to catch air before it enters.
Test and Adjust
Close the door or window and run your hand along the newly sealed edges to feel for remaining air movement. Repeat the tissue-paper test if needed. Open and close the door several times to confirm it latches smoothly without sticking. If the door feels too tight or the latch won't catch, the weatherstripping may be too thick for that section - try a thinner profile or reposition the strip slightly. Minor adjustments are normal; take your time to get the fit right before calling the job complete.
The content provided on our blog site traverses numerous categories, offering readers valuable and practical information. Readers can use the editorial team’s research and data to gain more insights into their topics of interest. However, they are requested not to treat the articles as conclusive. The website team cannot be held responsible for differences in data or inaccuracies found across other platforms. Please also note that the site might also miss out on various schemes and offers available that the readers may find more beneficial than the ones we cover.