

Starting With the Brief
The design process begins long before a single paint chip is selected. A project brief is a written document that captures how you use the space, who occupies it, your lifestyle needs, any non-negotiables, and a realistic budget range. Think of it as a decision filter: every later choice gets measured against it.
A strong brief answers these questions:
- What is the primary function of this space?
- Who uses it and how - formally, daily, by children or pets?
- What do you want to feel when you walk in?
- What currently frustrates you about the room?
- What is your approximate budget, and what is the hard ceiling?
Skipping this step is one of the most common reasons renovation projects derail. Without agreed-upon goals in writing, scope creep and misaligned expectations lead to expensive pivots. For broader home improvement planning, the same principle applies: define the goal before you pick up a tool.
Write your brief before opening any design inspiration app or website. Browsing before you have clear goals pulls you toward trends rather than toward what actually suits your life.
Design professionals consistently report that clients who brief first and browse second make faster, more decisive choices and experience fewer regrets at project completion.
When evaluating a floor plan layout, walk the arrangement in an empty room using painter's tape on the floor to mark furniture footprints before buying anything.
This low-cost simulation reveals circulation problems and awkward proportions that are nearly impossible to spot on paper, saving the expense of returning oversized or ill-fitting pieces.
Building a Mood Board
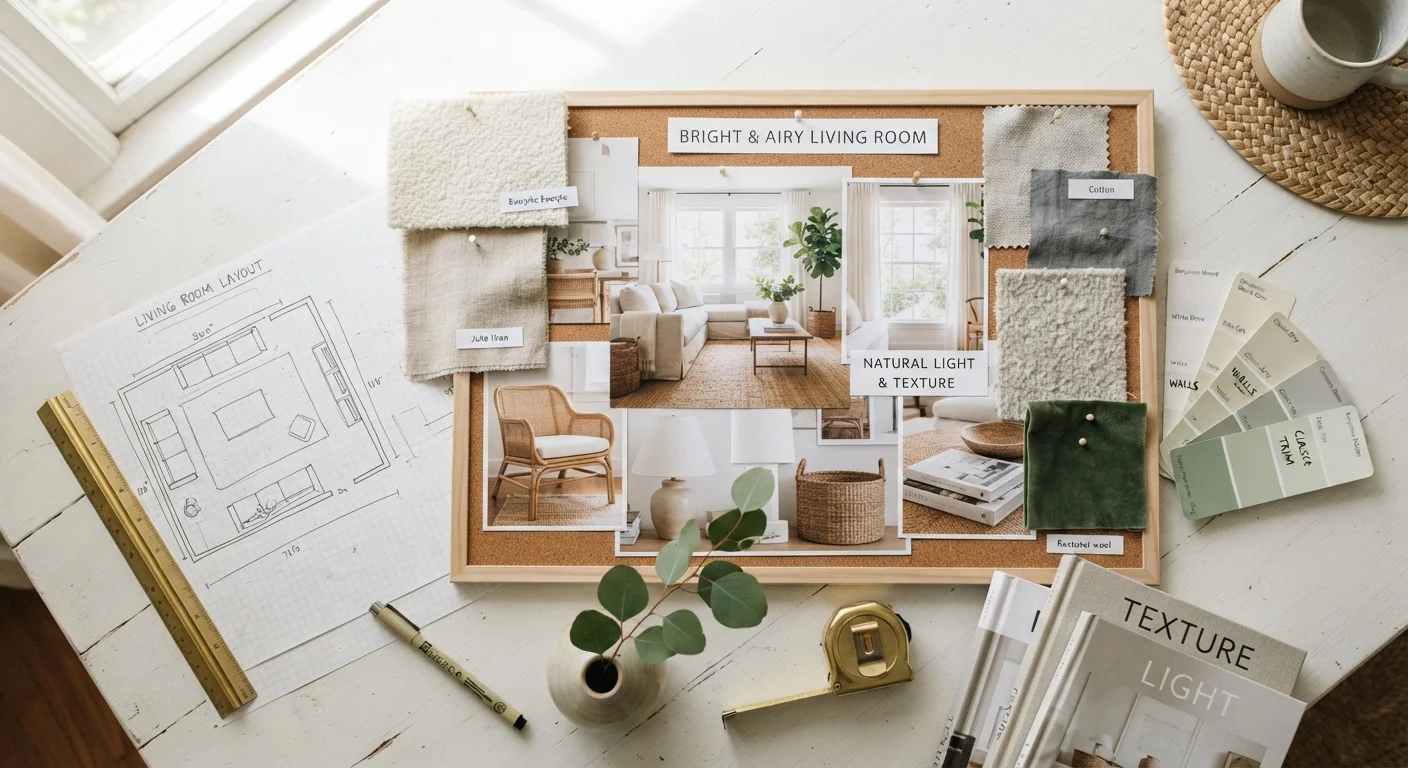
Once the brief is solid, visual research begins. A mood board translates abstract feelings - warmth, calm, energy - into concrete visual references: images, color palettes, textures, and material samples arranged together so you can see how they interact.
Digital tools make this accessible for non-designers. You can assemble reference images into a collage using any presentation software. The key is to edit ruthlessly: a focused mood board with 10-15 cohesive images is far more useful than a sprawling collection of 80 loosely related ones.
64%
Homeowners who changed design direction mid-project
According to Houzz research on renovation trends, roughly two-thirds of homeowners make significant design changes after construction has already begun, often citing unclear upfront planning.
3-5×
Cost multiplier of late-stage design changes
Industry estimates from design and construction professionals suggest that changes made during or after construction can cost three to five times more than the same change made on paper at the design stage.
Test your mood board against the brief. If the board feels energetic but the brief calls for a restful bedroom retreat, something needs to shift before you move on. This is the cheapest moment in the project to change direction.
Spatial Planning and Layout
Spatial planning is the process of deciding where furniture, lighting, storage, and architectural elements will sit within the room's footprint. It is the bridge between the emotional vision on your mood board and the physical reality of your space.
Start by measuring accurately - width, length, ceiling height, and the location of doors, windows, radiators, and outlets. Draw the room to scale on graph paper or in a free floor-plan tool. Then place furniture cutouts (also to scale) to test arrangements before anything is purchased or moved.
Prioritize traffic flow first: there should be a clear, unobstructed path through any room, with at least 30-36 inches of clearance between major furniture pieces where people regularly walk. Once circulation works, layer in function zones - a reading nook, a conversation grouping, a workspace - and then consider focal points like a fireplace or feature wall.
Use the 'Furniture First' Rule
Identify your largest anchor piece - sofa, bed, dining table - and plan the entire layout around it before selecting any other furniture. This prevents the common mistake of accumulating individual pieces that don't work together as a cohesive arrangement. Measure the anchor piece with its required clearances before finalizing any floor plan.
Material and Finish Selection
Materials give a design its tactile reality. At this stage, you are selecting flooring, wall treatments, cabinetry finishes, countertops, tile, hardware, and textiles - and critically, you are checking how they all read together in your actual light conditions.
Order physical samples whenever possible. Paint colors shift dramatically between a screen and a painted wall, and between morning and evening light. Pin samples to the wall, live with them for a few days, and evaluate in both natural and artificial light before committing.
Apply a practical hierarchy to every material choice:
- Durability: Will it withstand the actual use this space gets?
- Maintenance: Can you realistically care for it?
- Visual weight: Does it balance the other elements in the room?
- Cost per square foot versus impact: Invest where it shows most.
Licensed Trades Are Non-Negotiable for Regulated Work
Electrical, plumbing, gas, and structural work typically require permits and must be performed by licensed contractors in most US jurisdictions. Unpermitted work can affect your homeowner's insurance, create liability issues, and complicate future home sales. Always verify what requires a permit with your local building or zoning department before work begins - requirements vary significantly by municipality.
For structural or code-regulated work - moving walls, running new electrical circuits, or rerouting plumbing - always engage licensed contractors and verify permit requirements with your local building department before work begins.
Procurement, Trades, and Project Management
With design decisions documented, the project moves into execution. This phase has two parallel tracks: procurement (ordering furniture, materials, and fixtures) and trades coordination (scheduling contractors in the correct sequence).
Trade sequencing matters enormously. Demolition and structural work come first, then rough-in trades (electrical, plumbing, HVAC), then insulation and drywall, then flooring, then cabinetry and built-ins, then painting, and finally fixtures and finish hardware. Installing hardwood floors before painting, for example, risks costly finish damage.
Maintain a simple master spreadsheet tracking every item: vendor, lead time, delivery date, cost, and installation date. Long-lead items - custom furniture, imported tile, specialty lighting - should be ordered as soon as specifications are locked, often weeks or months before you need them on site.
Lead Times Vary Widely by Category
Custom upholstery and built-in cabinetry commonly carry lead times of 8-16 weeks. Imported tile and stone can take longer still, particularly when shipping from overseas suppliers. Planning your procurement calendar backward from your target completion date - rather than forward from when you feel ready to order - helps prevent costly delays and the need to store furniture off-site while trades finish.
Final Styling and the Finishing Layer
Styling is the final phase - and the one most homeowners underestimate. It is the deliberate arrangement of art, accessories, plants, books, textiles, and personal objects that transforms a technically complete room into a space that feels inhabited and intentional.
Work in odd-numbered groupings, vary object heights within a vignette, and leave deliberate negative space. Every surface does not need an object. The goal is visual rhythm, not fullness.
Lighting is part of styling too. Layer ambient (overhead), task (functional), and accent (decorative) sources to create flexibility for different times of day and moods. Dimmer switches are among the highest-impact, lowest-cost improvements available to any room.
Once you have completed your interior transformation, you may find the momentum carries outside - the same design thinking applied to garden and outdoor spaces can extend your home's character beyond the walls. A cohesive approach from the front door through the backyard creates a genuinely unified living environment.
“A room should be a composition of the people who live in it - their habits, collections, and contradictions. The designer's job is to give those elements order without robbing them of personality.”
— Albert Hadley, Influential American interior designer and co-founder of Parish-Hadley Associates
The content provided on our blog site traverses numerous categories, offering readers valuable and practical information. Readers can use the editorial team’s research and data to gain more insights into their topics of interest. However, they are requested not to treat the articles as conclusive. The website team cannot be held responsible for differences in data or inaccuracies found across other platforms. Please also note that the site might also miss out on various schemes and offers available that the readers may find more beneficial than the ones we cover.